
- Published on
A comprehensive guide to Android runtime permissions using Jetpack Compose
- Authors
- Name
- Alex Styl
- @alexstyl


In this tutorial, you will learn about the UX of Android runtime permissions and how to implement required and optional permission flows using Jetpack Compose. Common questions around permissions are also answered.
Understand the UX of Android runtime permissions
Android allows apps to request permissions in runtime. As permissions are requested in the form of an interruptive dialog, Android will prevent your app from requesting a specific permission to prevent apps from abusing this.
This behavior is not the same across different versions of Android. In Android 6.0 (Marshmallow) applications could display the permission request dialog as many times as they like, unless the user clicked on a Don't ask again checkbox in the dialog. In more modern versions of Android the system will prevent your app from displaying the request dialog if the user has declined a specific permission too many times.
In such case, the user would have to navigate to the application system settings (found in the device settings) and grant your app the permission manually. It is possible for your app to deep link to that setting directly.
When should you request a permission
Ideally you want to request the permission right before the user asks to use a feature that requires it. By requesting a permission out of the blue, you risk your app looking suspicious to your users (ie "Why does this torch light app need Location access?").
Requesting a permission right before you need it makes it obvious to your user for its importance. ("The app needs my microphone because I wanted to make a Voice note.")
The idea here is to tie a permission request to a related user action. Alternatively you can ask for necessary permissions during onboarding. This would be a good place to explain the user what your app does and why a particular permission is vital. In such scenario keep the onboarding slim, so that the user can start using the app straight away without asking for optional permissions.
Permissions can be optional
Depending on your requirements the permission you are requesting might be mandatory or not. A camera app depends on the CAMERA permission to function, but an 'Invite your friends' feature can still work without having the READ_CONTACTS permission by relying on Android's Share functionality instead of listing all contacts within your app.
Consider using an Intent or ActivityResultContract instead of permission
You do not need to implement any functionality that is not important to your app. Consider using an Intent or ActivityResultContract to ask an other app to perform a required action. An example of this would be a Social Media app asking the Gallery app for a photo so that the user can update their photo profile.
Adjust your UI according to your permission requirements
Whether a permission is optional or not will affect the experience of your app.
In the case of a required permission missing, you might want to display a full screen rationale explaining why the app is missing and what the user needs to do next if they chose to deny the permission.
If a permission is optional, blocking the entire screen is probably an overkill and a small hint would be more than enough.
Declare the required permission in your Manifest file
Before you request any permissions, you need to declare them in your AndroidManifest.xml file.
This is an example of declaring the CAMERA permission:
<!-- app/src/AndroidManifest.xml -->

<manifest xmlns:android="http://schemas.android.com/apk/res/android"
    xmlns:tools="http://schemas.android.com/tools">
        <uses-permission android:name="android.permission.CAMERA" />

        <!-- rest of your manifest -->
</manifest>
Add the Accompanist Permission dependency in your Android project
There is currently no dedicated permissions API baked in Jetpack Compose yet. However, Google is working on an experimental permissions library via Accompanist.
In your app/build.gradle file, include Accompanist Permission dependency:
dependencies {
    implementation "com.google.accompanist:accompanist-permissions:0.29.0-alpha"
}
You also need to make sure that your project can fetch dependencies via Maven Central. Open your settings.gradle file and make sure that mavenCentral() is included in your repositories:
dependencyResolutionManagement {
  repositories {
        google()
        mavenCentral()
    }
}
Accompanist provides a rememberPermissionState() function that will emit a new permission state as soon as the user enables or disables the specified permission. In addition, the state object can be used to check if you need to display further information to the user before requesting a permission. It can also be used to request for permissions.
Implement a required permission flow using Accompanist
If a permission is vital to your app's functionality you might want to block access to your app unless the permission is granted. One way of doing this is displaying a full screen rationale while the permission is denied. As the permission is tied to the core functionality to your app, you can ask for the permission straight away.
The following sample will ask for the Camera permission as soon as the composable enters the composition. If the user accepts the permission, the CameraScreen() composable will be displayed, which can freely use the Camera permission. If the user declines the permission, they will find the rationale on why the specific permission is required, with a link to visit the system settings.
@Composable
fun RequiredPermission() {
    val state = rememberPermissionState(Manifest.permission.CAMERA)
    Scaffold {
        when {
            state.status.isGranted -> CameraScreen()
            else -> {
                LaunchedEffect(Unit) {
                    state.launchPermissionRequest()
                }
                Box(Modifier
                    .fillMaxSize()
                    .background(MaterialTheme.colors.background)) {
                    Column(Modifier.padding(vertical = 120.dp, horizontal = 16.dp)) {
                        Icon(Icons.Rounded.Camera,
                            contentDescription = null,
                            tint = MaterialTheme.colors.onBackground)
                        Spacer(Modifier.height(8.dp))
                        Text("Camera permission required", style = MaterialTheme.typography.h6)
                        Spacer(Modifier.height(4.dp))
                        Text("This is required in order for the app to take pictures")
                    }
                    val context = LocalContext.current
                    Button(
                      modifier = Modifier
                        .align(Alignment.BottomCenter)
                        .fillMaxWidth()
                        .padding(16.dp),
                      onClick = {
                        val intent =
                            Intent(Settings.ACTION_APPLICATION_DETAILS_SETTINGS).apply {
                                data = Uri.fromParts("package", context.packageName, null)
                            }
                        startActivity(intent)
                    }) {
                        Text("Go to settings")
                    }
                }
            }
        }
    }
}
| Permission Granted | Permission Denied |
|---|---|
Implement an optional permission flow using Accompanist and ActivityResultContract
Optional permissions should not block your application from functioning when not granted. The following sample displays a floating action button that when clicked will check whether the optional permission is granted or not.
If the permission is granted, it uses the feature that required the permission (for simplicity, I am displaying a Toast). If the permission is not granted yet, it checks shouldShowRationale in order to display further information about the permission. In this case, a SnackBar appears that prompts the user to the system settings. If there is no need to display a rationale, the permission is requested.
In this sample, I use the Accompanist to check for the permission state as I prefer its API. Alternatively you can use ContextCompat.checkSelfPermission() and ActivityCompat.shouldShowRationale() functions instead if you want to skip the additional dependency:
@Composable
fun OptionalPermissionScreen() {
    val context = LocalContext.current.applicationContext

    val state = rememberPermissionState(Manifest.permission.CAMERA)
    val scaffoldState = rememberScaffoldState()
    val launcher = rememberLauncherForActivityResult(RequestPermission()) { wasGranted ->
        if (wasGranted) {
            // TODO do work (ie forward to viewmodel)
            Toast.makeText(context, "📸 Photo in 3..2..1", Toast.LENGTH_SHORT).show()
        }
    }
    Scaffold(
        modifier = Modifier.fillMaxSize(),
        scaffoldState = scaffoldState,
        floatingActionButton = {
            val scope = rememberCoroutineScope()
            val snackbarHostState = scaffoldState.snackbarHostState

            FloatingActionButton(onClick = {
                when (state.status) {
                    PermissionStatus.Granted -> {
                        // TODO do work (ie forward to viewmodel)
                        Toast.makeText(context, "📸 Photo in 3..2..1", Toast.LENGTH_SHORT).show()
                    }
                    else -> {
                        if (state.status.shouldShowRationale) {
                            scope.launch {
                                val result =
                                    snackbarHostState.showSnackbar(
                                        message = "Permission required",
                                        actionLabel = "Go to settings"
                                    )
                                if (result == SnackbarResult.ActionPerformed) {
                                    val intent = Intent(
                                        Settings.ACTION_APPLICATION_DETAILS_SETTINGS,
                                        Uri.fromParts("package", context.packageName, null)
                                    )
                                    startActivity(intent)
                                }
                            }
                        } else {
                            launcher.launch(Manifest.permission.CAMERA)
                        }
                    }
                }
            }) {
                Icon(Icons.Rounded.Camera, contentDescription = null)
            }
        }) {
        // the rest of your screen
    }
}
| Permission Granted | Permission Denied |
|---|---|
How to check if permission is present via a ViewModel
You can use ContextCompat.checkSelfPermission() (part of androidx.core) in order to check whether a permission is granted or not.
There is no official reactive way to be notified when a permission is granted within a ViewModel currently.
How can I check if a permission is permanently denied
There is no way to tell if a permission is permanently denied for all versions of Android as the behavior differs from version to version.
In Android 6.0, the ActivityCompat.shouldShowRationale() (part of androidx.core) returned false if the user has enabled the 'Don't show again' checkbox and denied the permission.
However, in modern versions of Android, the toggle is not there anymore and the system decides when your app can request permissions. On Android 11, the shouldShowRationale() returns false the first time you call it before requesting the permission. If the user denies the permission, then the shouldShowRationale() will return true. If the user denies the permission a second time, shouldShowRationale() returns false again.
This makes it impossible to predict if the next permission request will display the request dialog or not.
💭 If you are trying to detect whether you can ask for a permission or not, there is a better and simpler way. Instead of telling the user that a permission is permanently denied (which we cannot detect), mention that a required permission is missing instead. Optionally, offer a link to system settings as displayed in the required permission section of this guide.
Is there a way to check if my app can ask for permission before requesting?
Sort of. You could write custom logic that handles each Android version. Nothing guarantees that it will work the same on all devices and future versions of Android. As the behavior changes in different versions of Android, this can be difficult to maintain and test.
In the end of the day, you want to focus on your app's unique features.
🎁 BONUS: Make permission debugging a breeze
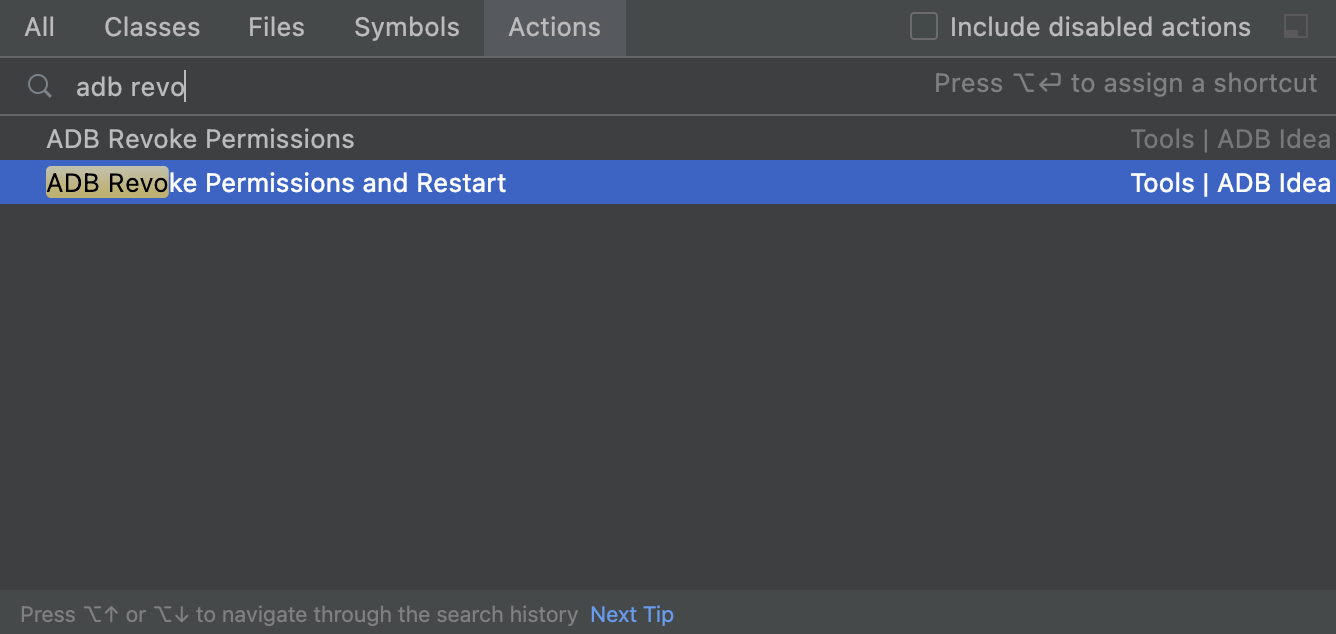
One tool that I use a lot when implementing permissions in Android is the ADB Idea plugin for Android Studio and IntelliJ IDEA.
I use it to revoke all permissions and start the flows I am working on from scratch.
Bring the actions window up using ⇧ ⌘ A (on Mac) or Control + Shift + A (Windows/Linux). Then start typing 'adb revoke':

In this article you learned about permissions in Android from a user and developer perspective. You should now be aware the UX of Android permissions, know about required and optional permissions and strategies on how to implement them. We also saw how to use Google's experimental permissions library to use permissions in combination to the ActivityResultContracts API to implement them.
Futher reading
- Permission changes in Android 11 on developer.android.com
- Official Permissions best practices on developer.android.com
- Foster user trust by adopting privacy-respecting permission workflows on youtube.com
- How to model complex screens in Jetpack Compose on composables.co
- Talking Android Permissions with Marcel Pintó on youtube.com